A Step-by-Step Guide to Implementing AttackGen for Improved Incident Response
In the ever-evolving landscape of cybersecurity, preparing for potential incidents is crucial. One innovative tool making waves in this domain is AttackGen. Developed by Matthew Adams, who heads the Security for GenerativeAI at Citi, AttackGen is designed to generate tailored incident response scenarios. This cutting-edge tool leverages the power of large language models (LLMs) to generate customized incident response scenarios tailored to specific industries and company sizes. Whether you’re in Aerospace & Defense or FinTech or Healthcare, AttackGen offers invaluable training scenarios to enhance your cybersecurity incident response capabilities.
What is AttackGen?
AttackGen is a cybersecurity incident response testing tool designed to help organizations prepare for potential threats. By using LLMs, it creates realistic incident response scenarios based on the chosen industry and company size. For instance, it can generate scenarios for a “Large” company with 201-1,000 employees in the Aerospace & Defense sector. These tailored scenarios are essential for training cybersecurity incident responders, providing them with practical, industry-specific exercises.
How to Get Started with AttackGen
To start using AttackGen, follow these steps:
- Clone the Repository
First, you’ll need to clone the AttackGen repository from GitHub. You can find it by searching for “AttackGen” or the profile of its creator, Matt Adams.
git clone https://github.com/mrwadams/attackgen.git- Navigate to the Directory
Change into the newly created ‘attackgen’ directory.
cd attackgen- Install Requirements
Install the necessary Python packages to run the tool.
pip install -r requirements.txt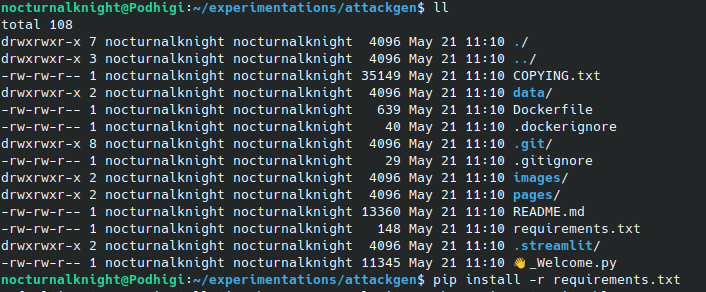
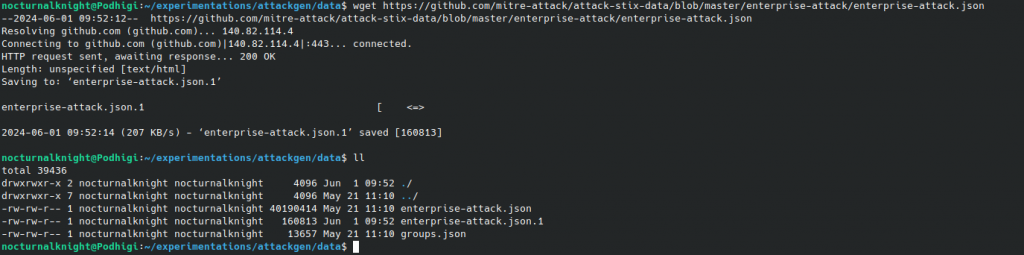
- Download MITRE ATT&CK Framework
Download the latest version of the MITRE ATT&CK framework and place it in the “data” directory within the attackgen folder.
Download MITRE ATT&CK Framework
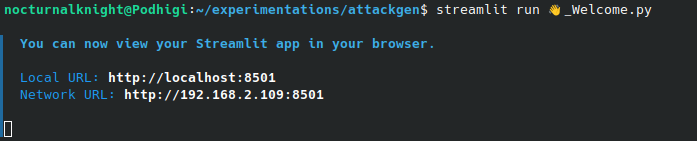
5. Run the Application
Start the application using Streamlit.
streamlit run 👋_Welcome.py
Using AttackGen
Once the application is up and running, open it in your preferred web browser. You’ll be greeted with the main page where you’ll need to enter your OpenAI API key. Also, for the record, AttackGen supports multiple LLMs, including the vaunted Mistral, Google AI, ollama and Azure OpenAI. After selecting your preferred models and entering your API key, follow these steps:
- Select Industry and Company Size
Choose your company’s industry and size to tailor the incident response scenarios. - Generate Scenario
Click on “✨ Generate Scenario” to proceed. - Choose Threat Actor Group
On the next page, select a threat actor group and associated ATT&CK techniques. - Download Scenario
After generating the scenario, you can download it in Markdown format for use in your incident response training. It’s advisable to upload this scenario to your version control system promptly.
Visualizing Your Scenarios
For those interested in visualizing the Tactics, Techniques, and Procedures (TTPs) included in your scenarios, consider using the ATT&CK Navigator. This tool helps identify, highlight, and prioritize TTPs effectively. You can learn more about this in one of my previous posts on Analyzing and Visualizing Cyberattacks using Attack Flow.
Conclusion
AttackGen is a powerful tool for enhancing your incident response training by providing realistic, industry-specific scenarios. Kudos to Matt Adams for developing this innovative tool. For more insights and guides on cybersecurity, follow me as I continue to explore and share new tools and techniques every week. Your feedback is always welcome!
References and Further Reading:
- MITRE ATT&CK Framework: A comprehensive database of tactics and techniques used by cyber adversaries.
- ATT&CK Navigator: A visualization tool to map and analyze TTPs.
- Streamlit Documentation: To understand how to deploy and use Streamlit applications.
Feel free to reach out with any questions or suggestions. Happy hunting! 🚀